Django ChatGPT Tutorial Series:
- Introduction
- Create Django Project with Modern Frontend Tooling
- Create Chat App
- Partial Form Submission With Turbo Frame
- Use Turbo Stream To Manipulate DOM Elements
- Send Turbo Stream Over Websocket
- Using OpenAI Streaming API With Celery
- Use Stimulus to Better Organize Javascript Code in Django
- Use Stimulus to Render Markdown and Highlight Code Block
- Use Stimulus to Improve UX of Message Form
- Source Code chatgpt-django-project
In this article, we will use OpenAI Streaming API in Celery worker and update the web page as we receive the chunks from OpenAI.
Objective
- Learn what is Celery and how to set it up.
- Learn how to update the web page in Celery worker, via the Django Channels layer, without writing Javascript.
Celery:
Celery is an open source, asynchronous task queue that's often coupled with Python-based web frameworks like Django or Flask to manage background work outside the typical request/response cycle.
You can also RQ (Redis Queue) and Huey as alternatives to Celery. But I will use Celery in this article.
Install Celery
Add below packages to the requirements.txt:
celery==5.3.4
watchfiles==0.21.0
Install:
(venv)$ pip install -r requirements.txtCreate a chatgpt_django_app/celery.py file in the same folder as wsgi.py:
import os

from celery import Celery

from django.conf import settings

# this code copied from manage.py
# set the default Django settings module for the 'celery' app.
os.environ.setdefault('DJANGO_SETTINGS_MODULE', 'chatgpt_django_app.settings')

# you can change the name here
app = Celery("chatgpt_django_app")

# read config from Django settings, the CELERY namespace would make celery
# config keys has `CELERY` prefix
app.config_from_object('django.conf:settings', namespace='CELERY')

# discover and load tasks.py from from all registered Django apps
app.autodiscover_tasks(lambda: settings.INSTALLED_APPS)


@app.task
def divide(x, y):
    import time
    time.sleep(5)
    return x / y
In the same folder, update chatgpt_django_app/init.py like so:
# This will make sure the app is always imported when
# Django starts so that shared_task will use this app.
from .celery import app as celery_app

__all__ = ('celery_app',)
Since Celery can read config from the Django settings file, add the following config to django_celery_example/settings.py for better configuration management:
CELERY_BROKER_URL = "redis://127.0.0.1:6379/0"
CELERY_RESULT_BACKEND = "redis://127.0.0.1:6379/0"
Sending a Task to Celery
With the config done, let's try sending a task to Celery to see how it works.
In a new terminal window, navigate to your project directory, activate the virtual environment, and then run:
(venv)$ watchfiles 'celery -A chatgpt_django_app worker --loglevel=info' chatgpt_django_appNotes:
watchfileswill watch the directorychatgpt_django_app, and restart Celery worker if any file changes, this can help us during the development
You should see something similar to:
- ** ---------- [config]
- ** ---------- .> app:         chatgpt_django_app:0x1058c0450
- ** ---------- .> transport:   redis://127.0.0.1:6379/0
- ** ---------- .> results:     redis://127.0.0.1:6379/0
- *** --- * --- .> concurrency: 16 (prefork)
-- ******* ---- .> task events: OFF (enable -E to monitor tasks in this worker)
--- ***** -----
 -------------- [queues]
                .> celery           exchange=celery(direct) key=celery


[tasks]
  . chatgpt_django_app.celery.divide
Enter Django shell
(venv)$ python manage.py shell
>>>
Let's send some tasks to the Celery worker:
>>> from chatgpt_django_app.celery import divide
>>> task = divide.delay(1, 2)- We used the
delaymethod to send a message to the message broker. The Celery worker process then picked up and executed the task from the queue. - After releasing from the Enter key, the code finished executing while the
dividetask ran in the background.
Turn to the Celery worker terminal. You should see something similar to:
[2023-10-26 07:12:34,982: INFO/MainProcess] Task chatgpt_django_app.celery.divide[f8b42064-c484-48df-819e-8793434926d8] received
[2023-10-26 07:12:39,994: INFO/ForkPoolWorker-15] Task chatgpt_django_app.celery.divide[f8b42064-c484-48df-819e-8793434926d8] succeeded in 5.009384345961735s: 0.5
Add a new task then print task.state and task.result:
>>> print(task.state, task.result)
PENDING None

>>> print(task.state, task.result)
PENDING None

>>> print(task.state, task.result)
PENDING None

>>> print(task.state, task.result)
PENDING None

>>> print(task.state, task.result)
PENDING None

>>> print(task.state, task.result)
SUCCESS 0.5

>>> print(task.state, task.result)
SUCCESS 0.5
Notes:
- The task is executed in the Celery worker process and the result is available after the task finished.
Workflow
- In Django view, after user message is created, we send a task to the Celery worker, and then return HTTP response back, without blocking web process.
- In Celery worker, we call OpenAI Streaming API to get the AI response.
- If we get response from OpenAI Streaming API, we generate Turbo Stream element code, and send it to Channel layer group.
- On the frontend, if Turbo receive the Turbo Stream element, it will use the element to append/update the AI message to the message list.
Celery Task
Create chatgpt_django_app/chat/tasks.py
import openai
from celery import shared_task

from .models import Message


@shared_task(name="task_ai_chat")
def task_ai_chat(message_pk):
    message_instance = Message.objects.get(pk=message_pk)
    chat_instance = message_instance.chat

    messages = Message.for_openai(chat_instance.messages.all())

    try:
        response = openai.ChatCompletion.create(
            model="gpt-3.5-turbo",
            messages=messages,
            temperature=0,
            stream=True,
        )

        # iterate through the stream of events
        for index, chunk in enumerate(response):
            if index == 0:
                # clear content and ready to display response from OpenAI
                message_instance.content = ""

            content = chunk["choices"][0].get("delta", {}).get("content")
            if content is not None:
                message_instance.content += content
                message_instance.save(update_fields=["content"])

    except Exception as e:
        message_instance.content += str(e)
        message_instance.save(update_fields=["content"])
Notes:
- In this Celery task, we call OpenAI API to get the AI response, and then update the message content.
- Please note we set
stream=Truein theopenai.ChatCompletion.createcall
Setting stream: true in a request makes the model start returning tokens as soon as they are available, instead of waiting for the full sequence of tokens to be generated. It does not change the time to get all the tokens, but it reduces the time for first token for an application where we want to show partial progress or are going to stop generations. This can be a better user experience and a UX improvement so it’s worth experimenting with streaming.
Each time we receive chunk from OpenAI, we will concatenate new content with the previous value, and then save back to the database.
Signal Receiver
Create chatgpt_django_app/chat/receiver.py
from asgiref.sync import async_to_sync
from channels.layers import get_channel_layer
from django.db.models.signals import post_save
from django.db.transaction import on_commit
from django.dispatch import receiver
from turbo_response import TurboStream

from chatgpt_django_app.chat.tasks import task_ai_chat

from .models import Message


@receiver(post_save, sender=Message)
def handle_user_message(sender, instance, created, **kwargs):
    html = (
        TurboStream(f"chat-{instance.chat.pk}-message-list")
            .append.template(
            "message_item.html",
            {
                "instance": instance,
            },
        )
            .render()
    )
    channel_layer = get_channel_layer()
    group_name = f"turbo_stream.chat_{instance.chat.pk}"
    async_to_sync(channel_layer.group_send)(
        group_name, {"type": "html_message", "html": html}
    )

    if created and instance.role == Message.USER:
        message_instance = Message.objects.create(
            role=Message.ASSISTANT,
            content="Thinking...",
            chat=instance.chat,
        )

        # call openai chat task in Celery worker
        on_commit(lambda: task_ai_chat.delay(message_instance.pk))
Notes:
- Here we use Django signal to make the code more clean.
- Everytime the message instance is saved, we will send a Turbo Stream element to the Channel layer group, this can make the frontend to append/update the message list.
- If the message is created and come from user input, then we will create a new AI message with role=Message.ASSISTANT, and then call the Celery task to get the response from the OpenAI.
Update chatgpt_django_app/chat/apps.py
from django.apps import AppConfig


class ChatConfig(AppConfig):
    default_auto_field = 'django.db.models.BigAutoField'
    name = 'chatgpt_django_app.chat'

    def ready(self):
        from chatgpt_django_app.chat import receiver       # new
Notes:
- We need to import the receiver in the ready() method, or it will not work.
View
Update chatgpt_django_app/chat/views.py
class MessageCreateView(CreateView):

    # code omitted for brevity

    def form_valid(self, form):
        super().form_valid(form)
        request = self.request

        # return Turbo Stream to do partial updates on the page
        return TurboStreamResponse(
            [
                TurboStream("message-create-frame")
                    .replace.template(
                    self.template_name,
                    {
                        "form": self.get_empty_form(),
                        "request": request,
                        "view": self,
                    },
                ).response(request).rendered_content,
            ]
        )
Notes:
- We only reset the form here, and other code has been moved to the above signal receiver.
Test
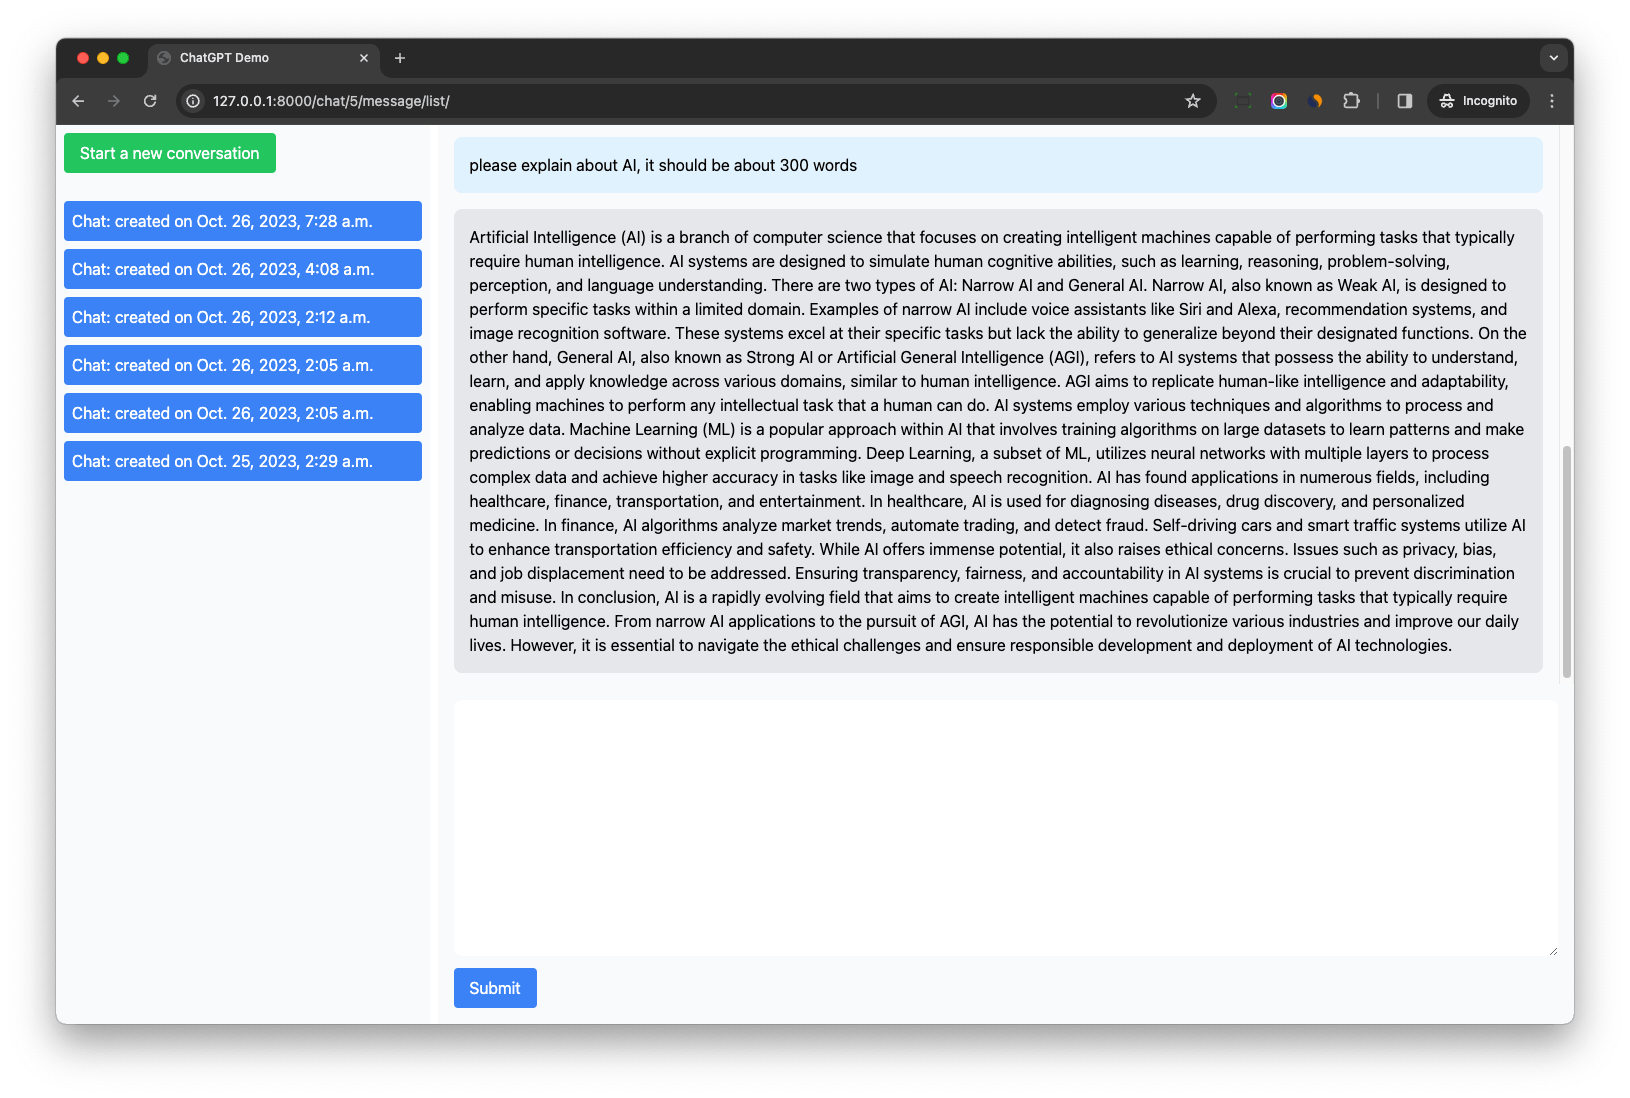
Please make sure Celery worker is running, and try to generate long response from OpenAI, for example: "please explain about AI, it should be about 300 words"
We can see the AI response display incrementally on the web page.
Notes:
- When we click submit button to send the user message, Django view will create message instance and return Turbo Stream element to reset the form immediately.
- The signal receive will then send Turbo Stream element of the user message instance to the channel layer group, to append the user message to the message list, "please explain about AI, it should be about 300 words" will be appended to the message list.
- And AI message is also created in the signal receiver with
content="Thinking...", and then we schedule the Celery task to get the AI response. - After AI message instance is saved, the signal receiver
handle_user_messagewill be called again (for AI message instance), and Turbo Stream element of the AI message will be sent to the channel layer group, to append the new message to the message list, "Thinking..." will be appended to the message list - When the Celery task run, if it receives chunk from OpenAI, it will update the AI message instance's content, and then save back to the database.
- Signal receiver
handle_user_messagewill be called to send Turbo Stream element to update the AI element in the message list, so user can see the AI response display incrementally on the web page.
Turbo Stream Append Action
After we do the above test, if we check WS in the network tab, we can see the Websocket messages like below Turbo Stream elements:
<turbo-stream action="append" target="chat-5-message-list"><template><div id="message_50">
  <div class="p-4 m-4 max-w-full bg-gray-200 rounded-lg prose">Art</div>
</div></template></turbo-stream><turbo-stream action="append" target="chat-5-message-list"><template><div id="message_50">
<div class="p-4 m-4 max-w-full bg-gray-200 rounded-lg prose">Artificial</div>
</div></template></turbo-stream>Both of the turbo stream elements had action="append"", why did they not cause duplicate elements in the message list?
If the template’s first element has an id that is already used by a direct child inside the container targeted by dom_id, it is replaced instead of appended.
So even we send Turbo Stream which has append action, the AI message will be replaced instead of appended in the message list.
Other Notes
If we check Celery worker terminal, we might see "channels over capacity in group turbo_stream.chat_5"
To resolve this, update CHANNEL_LAYERS in chatgpt_django_app/settings.py
CHANNEL_LAYERS = {
    'default': {
        'BACKEND': 'channels_redis.core.RedisChannelLayer',
        'CONFIG': {
            "hosts": ["redis://127.0.0.1:6379/0"],
            # https://github.com/django/channels_redis/issues/181
            # To make openai demo work without warnings
            "capacity": 1500,  # default 100
        },
    },
}
Conclusion
In this article, we have learned how to use Celery, Django Channels and Turbo Stream to make OpenAI Streaming API work with Django.
We did not write any Javascript, but the final effect seems amazing.
Django ChatGPT Tutorial Series:
- Introduction
- Create Django Project with Modern Frontend Tooling
- Create Chat App
- Partial Form Submission With Turbo Frame
- Use Turbo Stream To Manipulate DOM Elements
- Send Turbo Stream Over Websocket
- Using OpenAI Streaming API With Celery
- Use Stimulus to Better Organize Javascript Code in Django
- Use Stimulus to Render Markdown and Highlight Code Block
- Use Stimulus to Improve UX of Message Form
- Source Code chatgpt-django-project